
Magic Scones
I don’t know what the weather is doing where you live, but here in Kitchener, the last week has felt a little bleak. Just the week before, it had begun to really, truly feel like spring. After a long, hard winter, spent endlessly chipping ice off the driveway and coaxing hopelessly unfocused children into snowsuits, the snow was finally gone and the sun was out. Mae and I celebrated by dragging all of the outside furniture out of storage and planting some veggie seeds for our garden to get a head start in the kitchen window. Then this past Saturday, this happened:

Gross.
Waking up to this, there was nothing to be done but hole up and drown my sorrows with a bucket of coffee and some pastries while watching too many house tours and cooking shows on YouTube.
Whenever I need a ball of carb-y pastry love in a hurry, I turn to this genius scone recipe that my friend Jill found years ago. The reason it’s genius is that it uses yogurt and olive oil in place of butter. Not only does this make it (marginally) healthier, but it also means they come together super quickly, because you don’t have to work cold cubes of butter into the flour. They are also endlessly riff-able—I have made tons of variations, both savoury and sweet. If you use plain yogurt, and leave out all but a tablespoon or two of the sugar, they become a really nice accompaniment to soup or a salad. If you want to really jazz them up, swap out the olive oil for pesto. Or, add lemon juice and zest and poppy seeds, or vanilla yogurt and dried cherries, or apricots and toasted almonds. You get the idea.
A couple of caveats:
While these scones are, as I have said, genius, and super easy, it may take you a couple of tries to really get a sense for the ratio of dry to liquid ingredients. Since I am constantly fiddling with the recipe, swapping in alternate flours, fats, juices, and mix-ins, I find it is kind of best to go by feel, rather than adhering strictly to the measurements given. Basically, you want the dough to just come together so that there isn’t a lot of excess flour in the bottom of the bowl. It should be pretty sticky, but not too soggy. If it seems too dry, drizzle a tablespoon or two of extra milk onto the dry patches until it seems workable. If it seems a bit soupy, add a bit of extra flour.
Similarly, the baking time on these can vary a bit. If you give them a little poke or squeeze, they should feel pretty firm, and the bottoms should be a deep golden brown, but not burnt. The edges of the tops should be be golden and crispy. If they seem a bit squidgy or pale, just keep putting them back in for a couple of minutes at a time until they look crisper. No one likes a gummy, under-cooked scone.
Because they don’t have butter in them, these really are best eaten as soon as possible. If I am making them for guests, I often mix the wet and dry separately ahead of time, stirring them together and tossing them in the over right before people are due to arrive. If there are left overs, they will still be fine, just not glorious. Throw them into the microwave for 20 seconds or so, slather them in butter, and no one will complain.
Basic Yogurt and Olive Oil Scones
Makes 8 Scones
Ingredients:
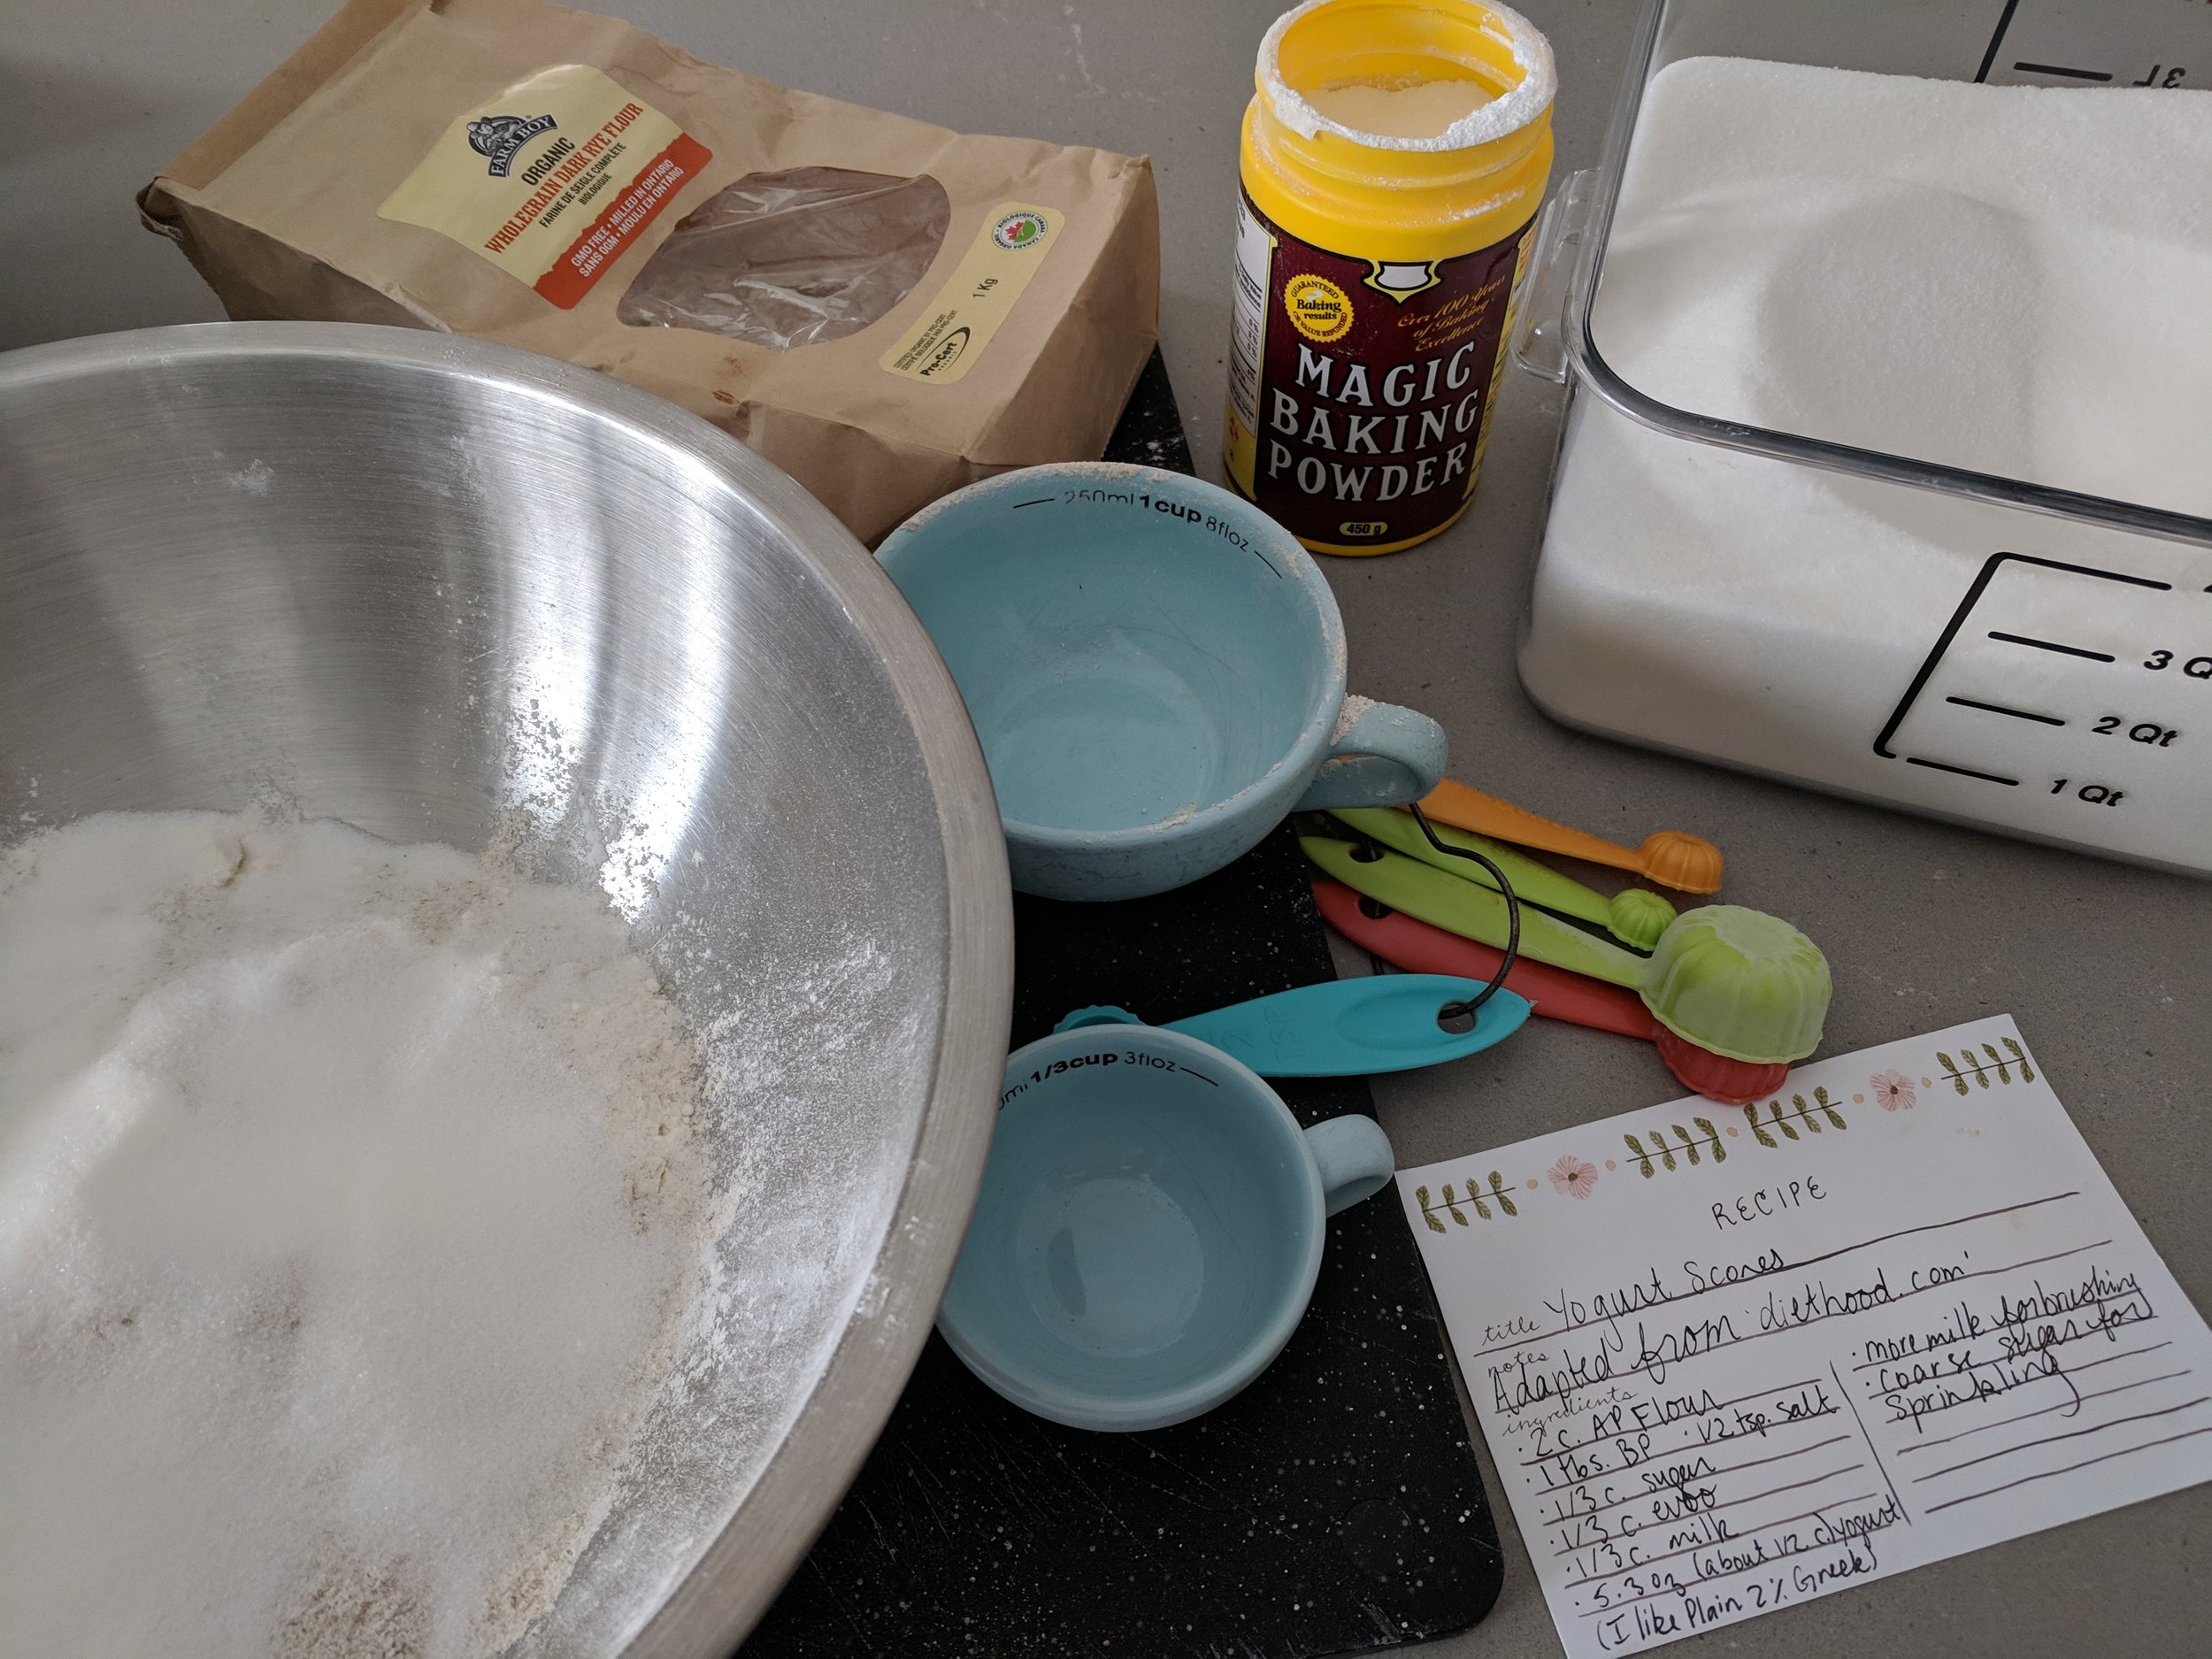
Dry Ingredients:
2 c. all purpose flour
1 tbs baking powder
1/2 tsp kosher salt
1/3 c. granulated sugar
Wet Ingredients:
5.3 oz. vanilla yogurt*
1/3 c. extra virgin olive oil**
1/3 c. milk
Topping:
splash of milk
sprinkle of sugar ***
*If you don’t have a scale, this is the equivalent of a very generous 1/2 c. I like to use 2% yogurt, but whatever you have will work. If it is very thick (like Greek yogurt, or Icelandic Skyr, you might want to thin it out with a little milk. I often use plain yogurt because that is what I usual have in my fridge, in which case I throw in an extra spoon full of sugar and a splash of vanilla extract.
**You could also use vegetable oil if you prefer.
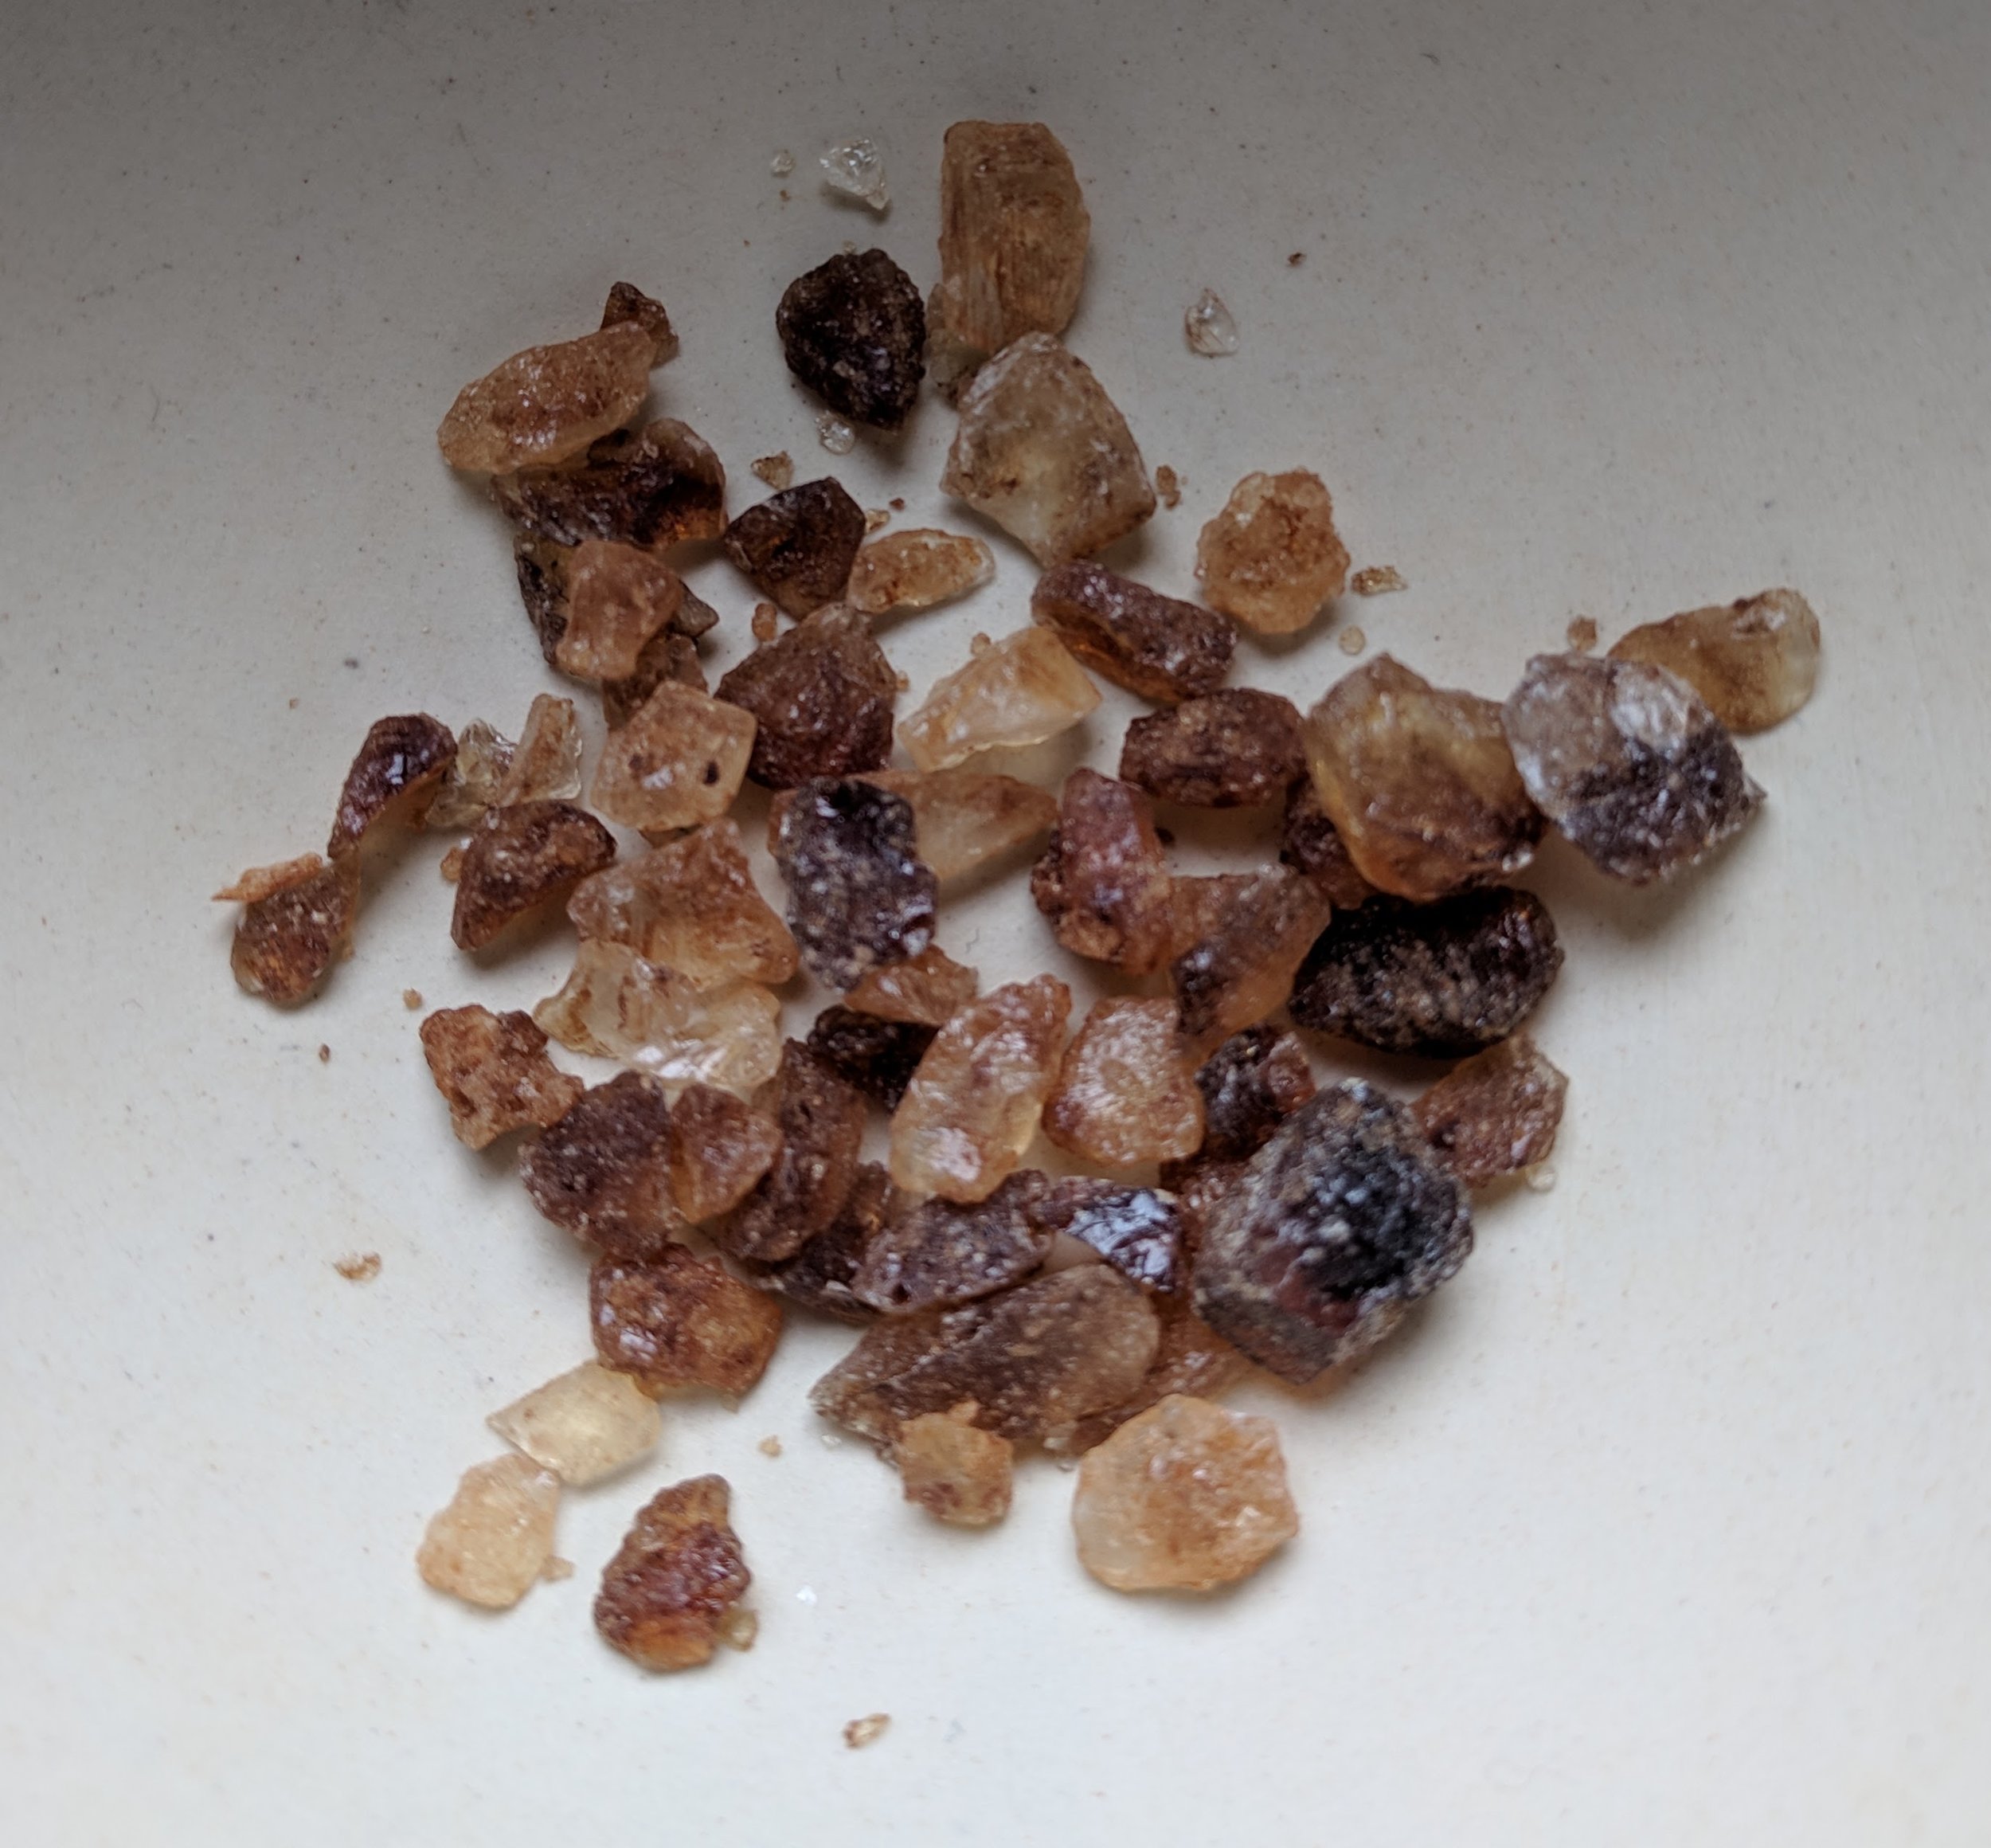
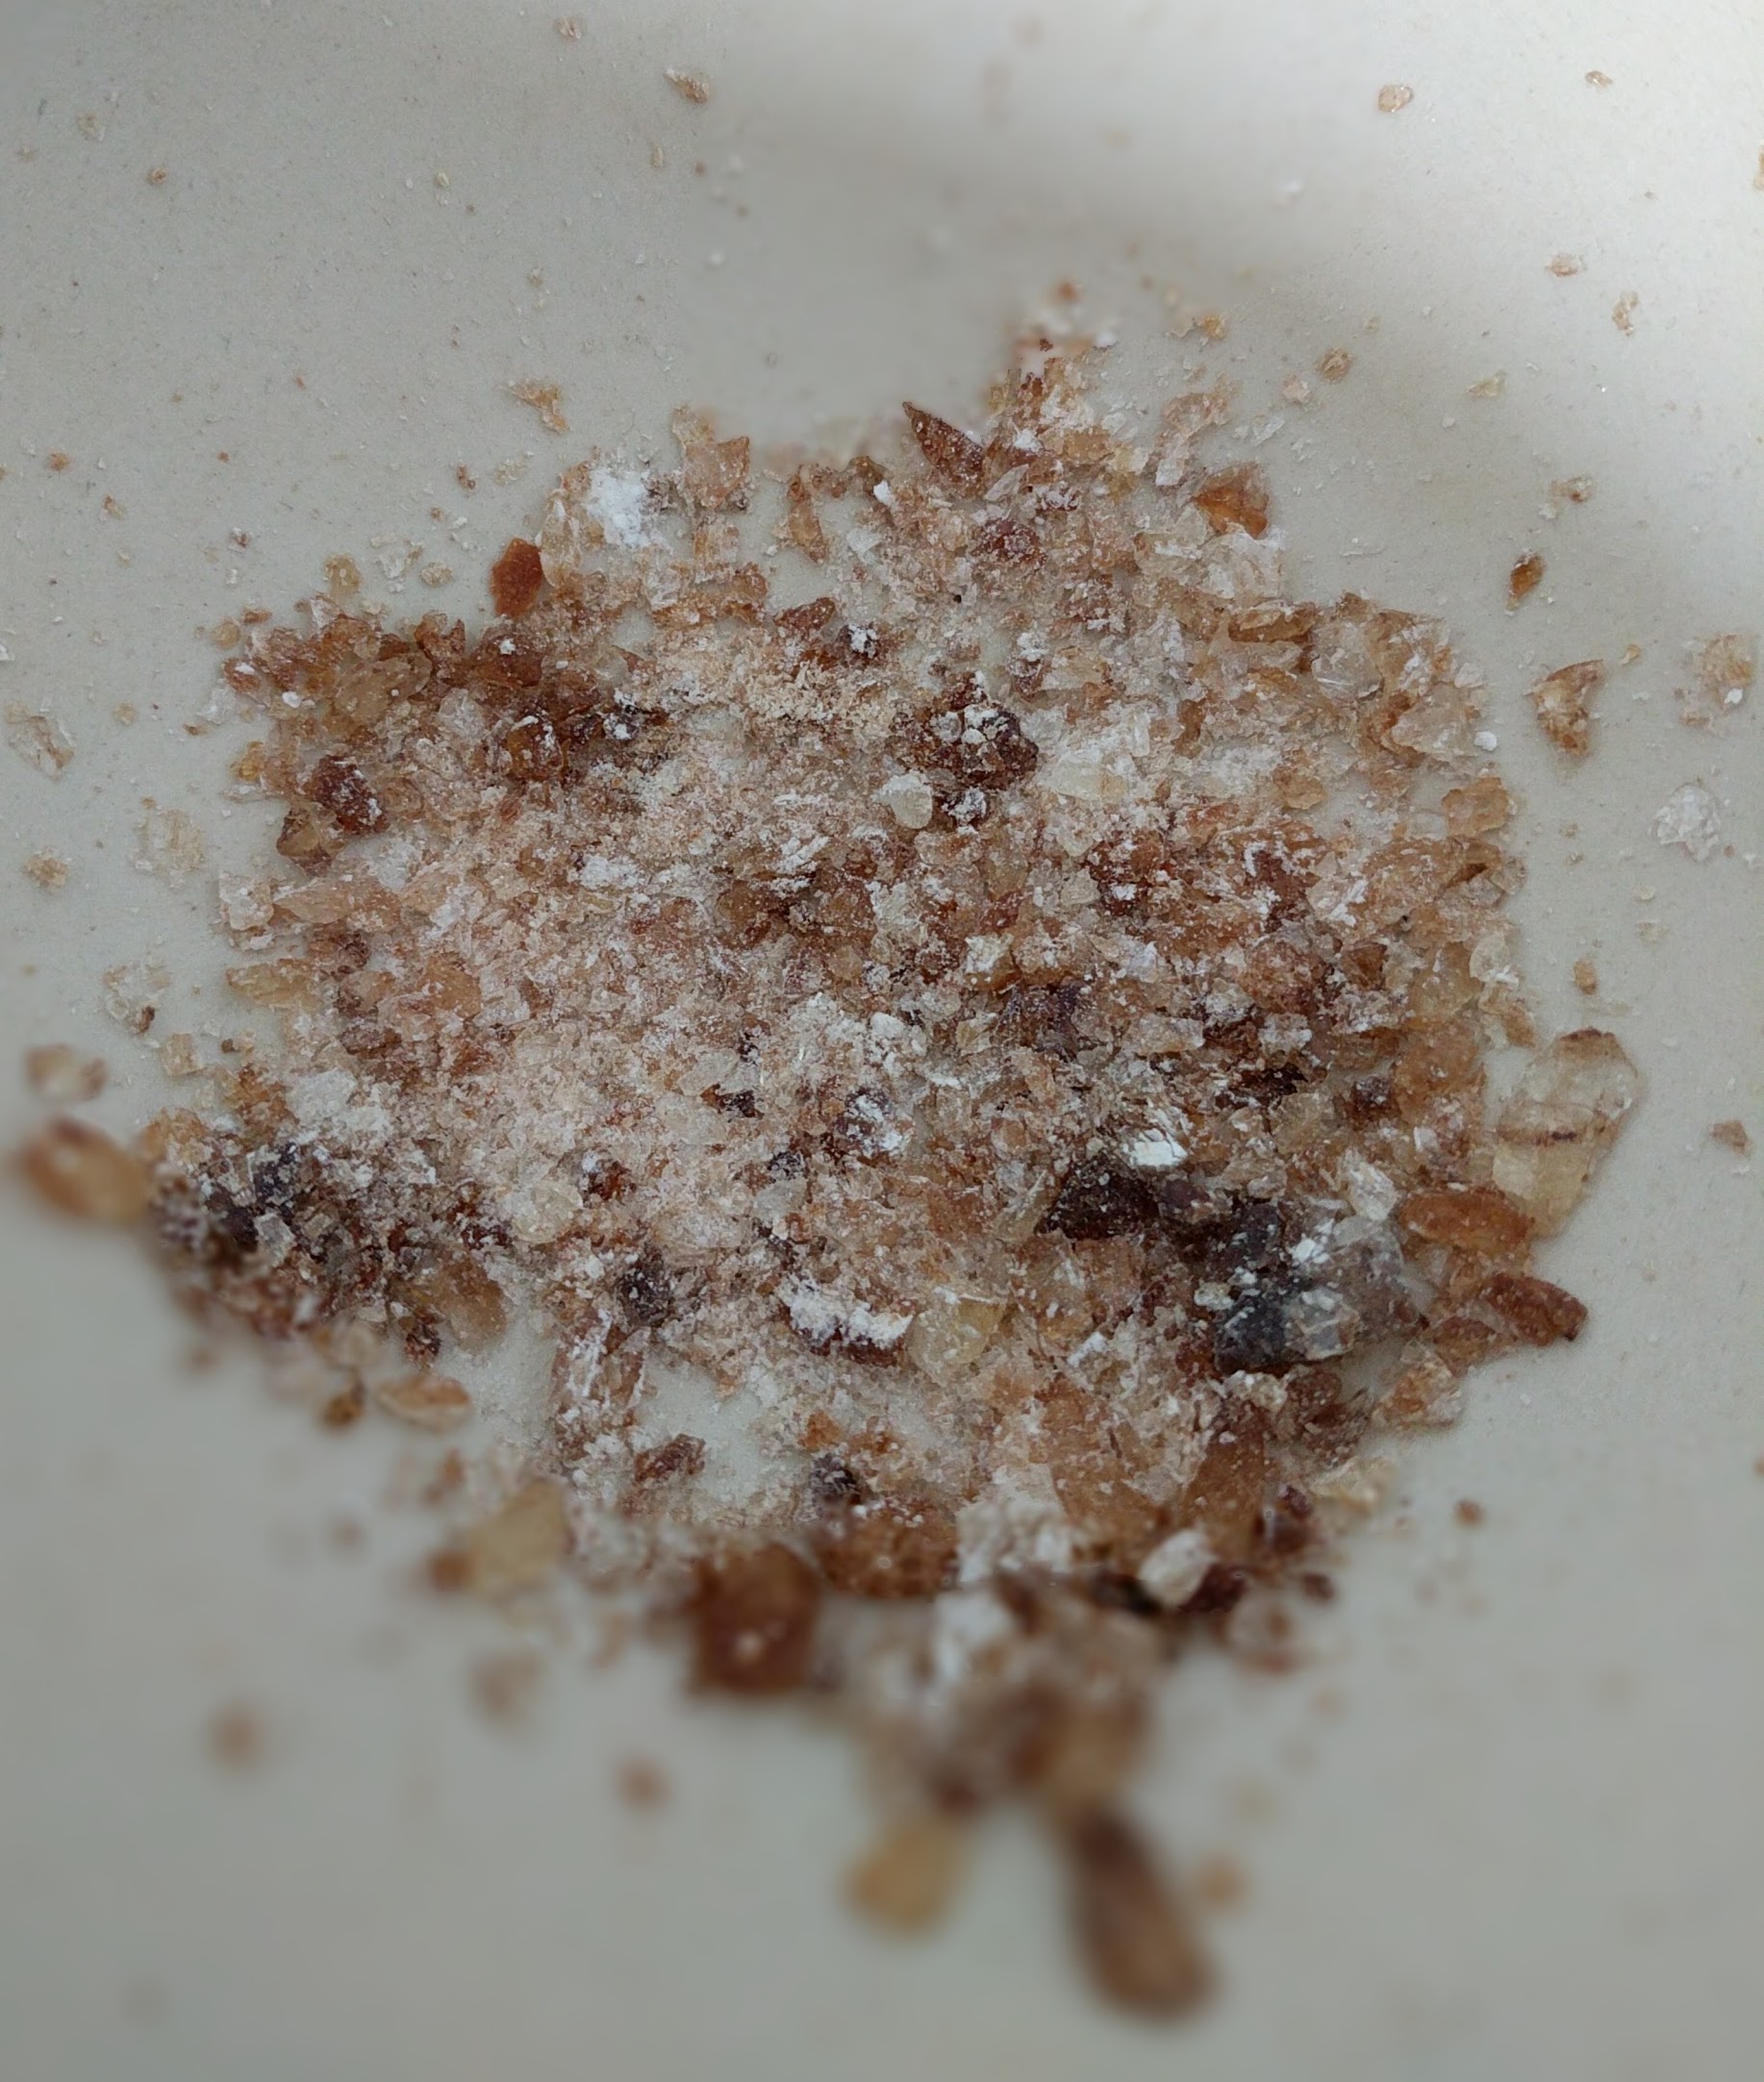
***I like to use some beautiful rock sugar that I bash up in a mortar and pestle, because I am, frankly, very, very fancy. Feel free to use any coarse sugar you have on hand, or just caster regular old granulated sugar if that is all you’ve got. It’s all good!
Method:
Preheat oven to 400 degrees F. Centre a rack in the middle of your oven.
Line a sheet pan with parchment paper and set aside.
Measure dry ingredients into a large bowl and whisk to combine.
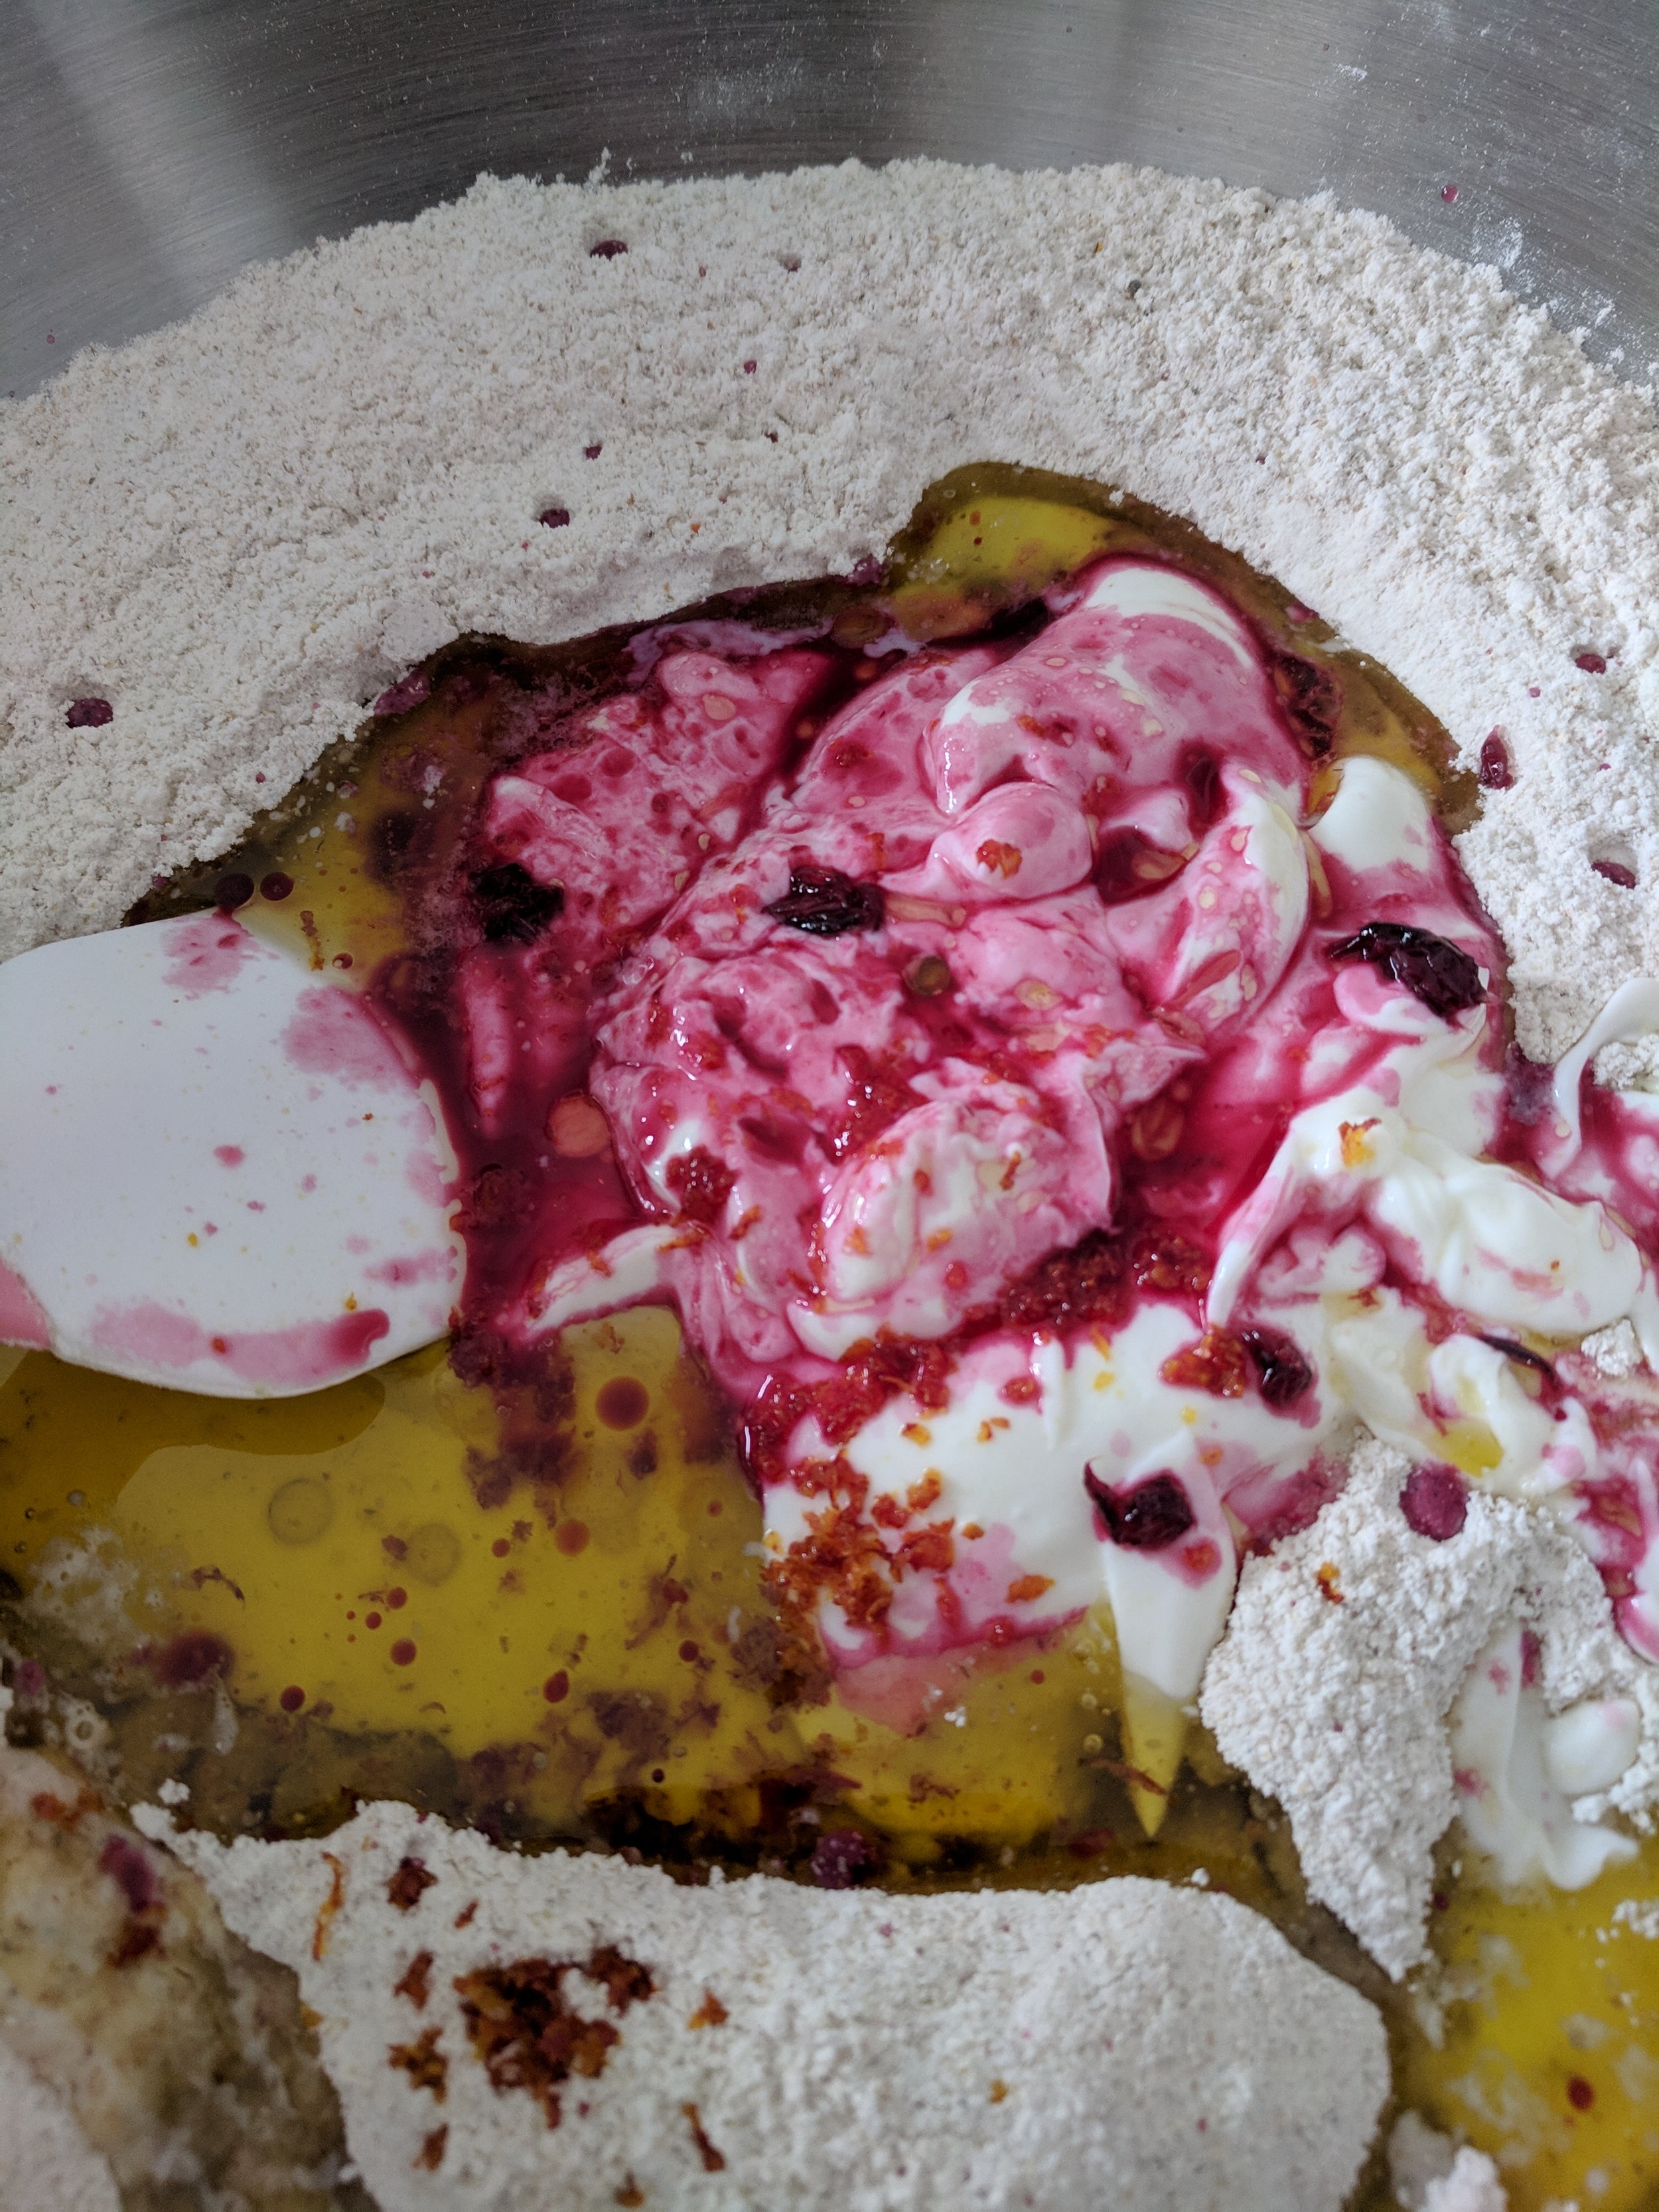
Add wet ingredients to a medium bowl or glass measuring cup and whisk well.
Dump the wet ingredients into the dry and gently stir until no dry streaks remain. Do not over mix!
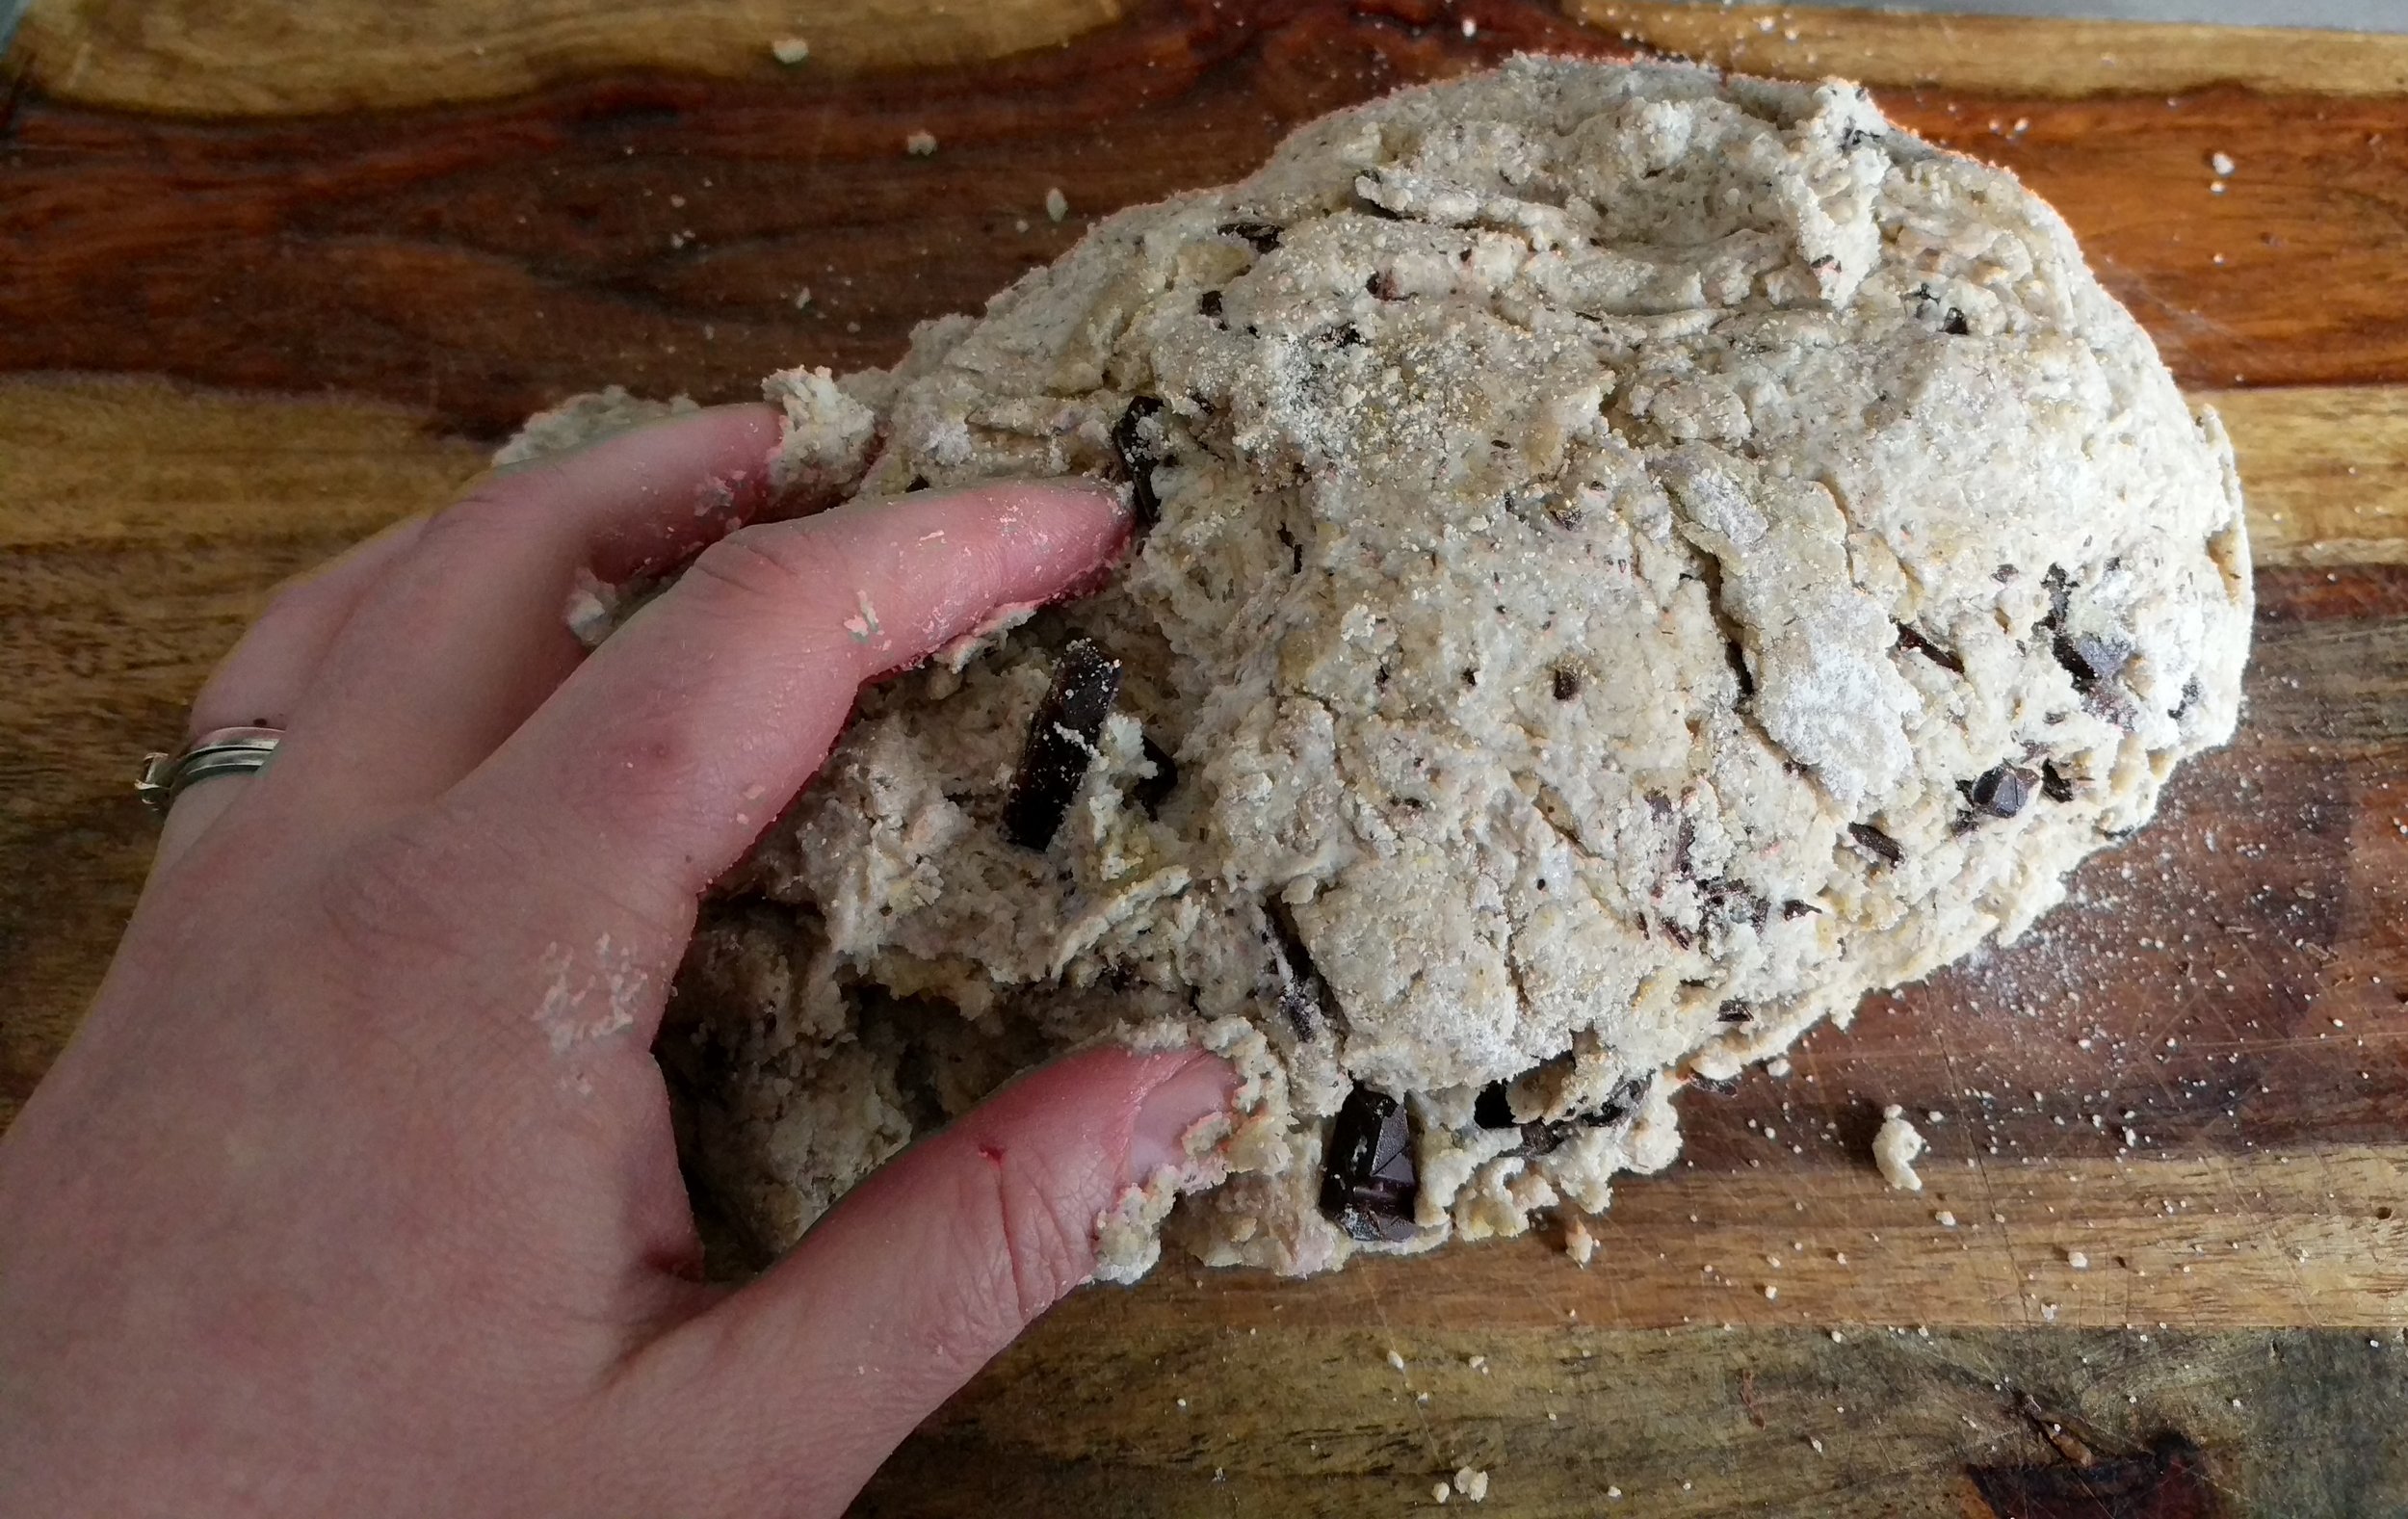
Turn out dough onto your counter or cutting board. Gently kneed it by folding it over on itself a couple of times. This make sure that the flour is all incorporated, and help to promote the formation of flaky layers, but don’t get carried away! If you over kneed, the scones will become hockey puck-like.
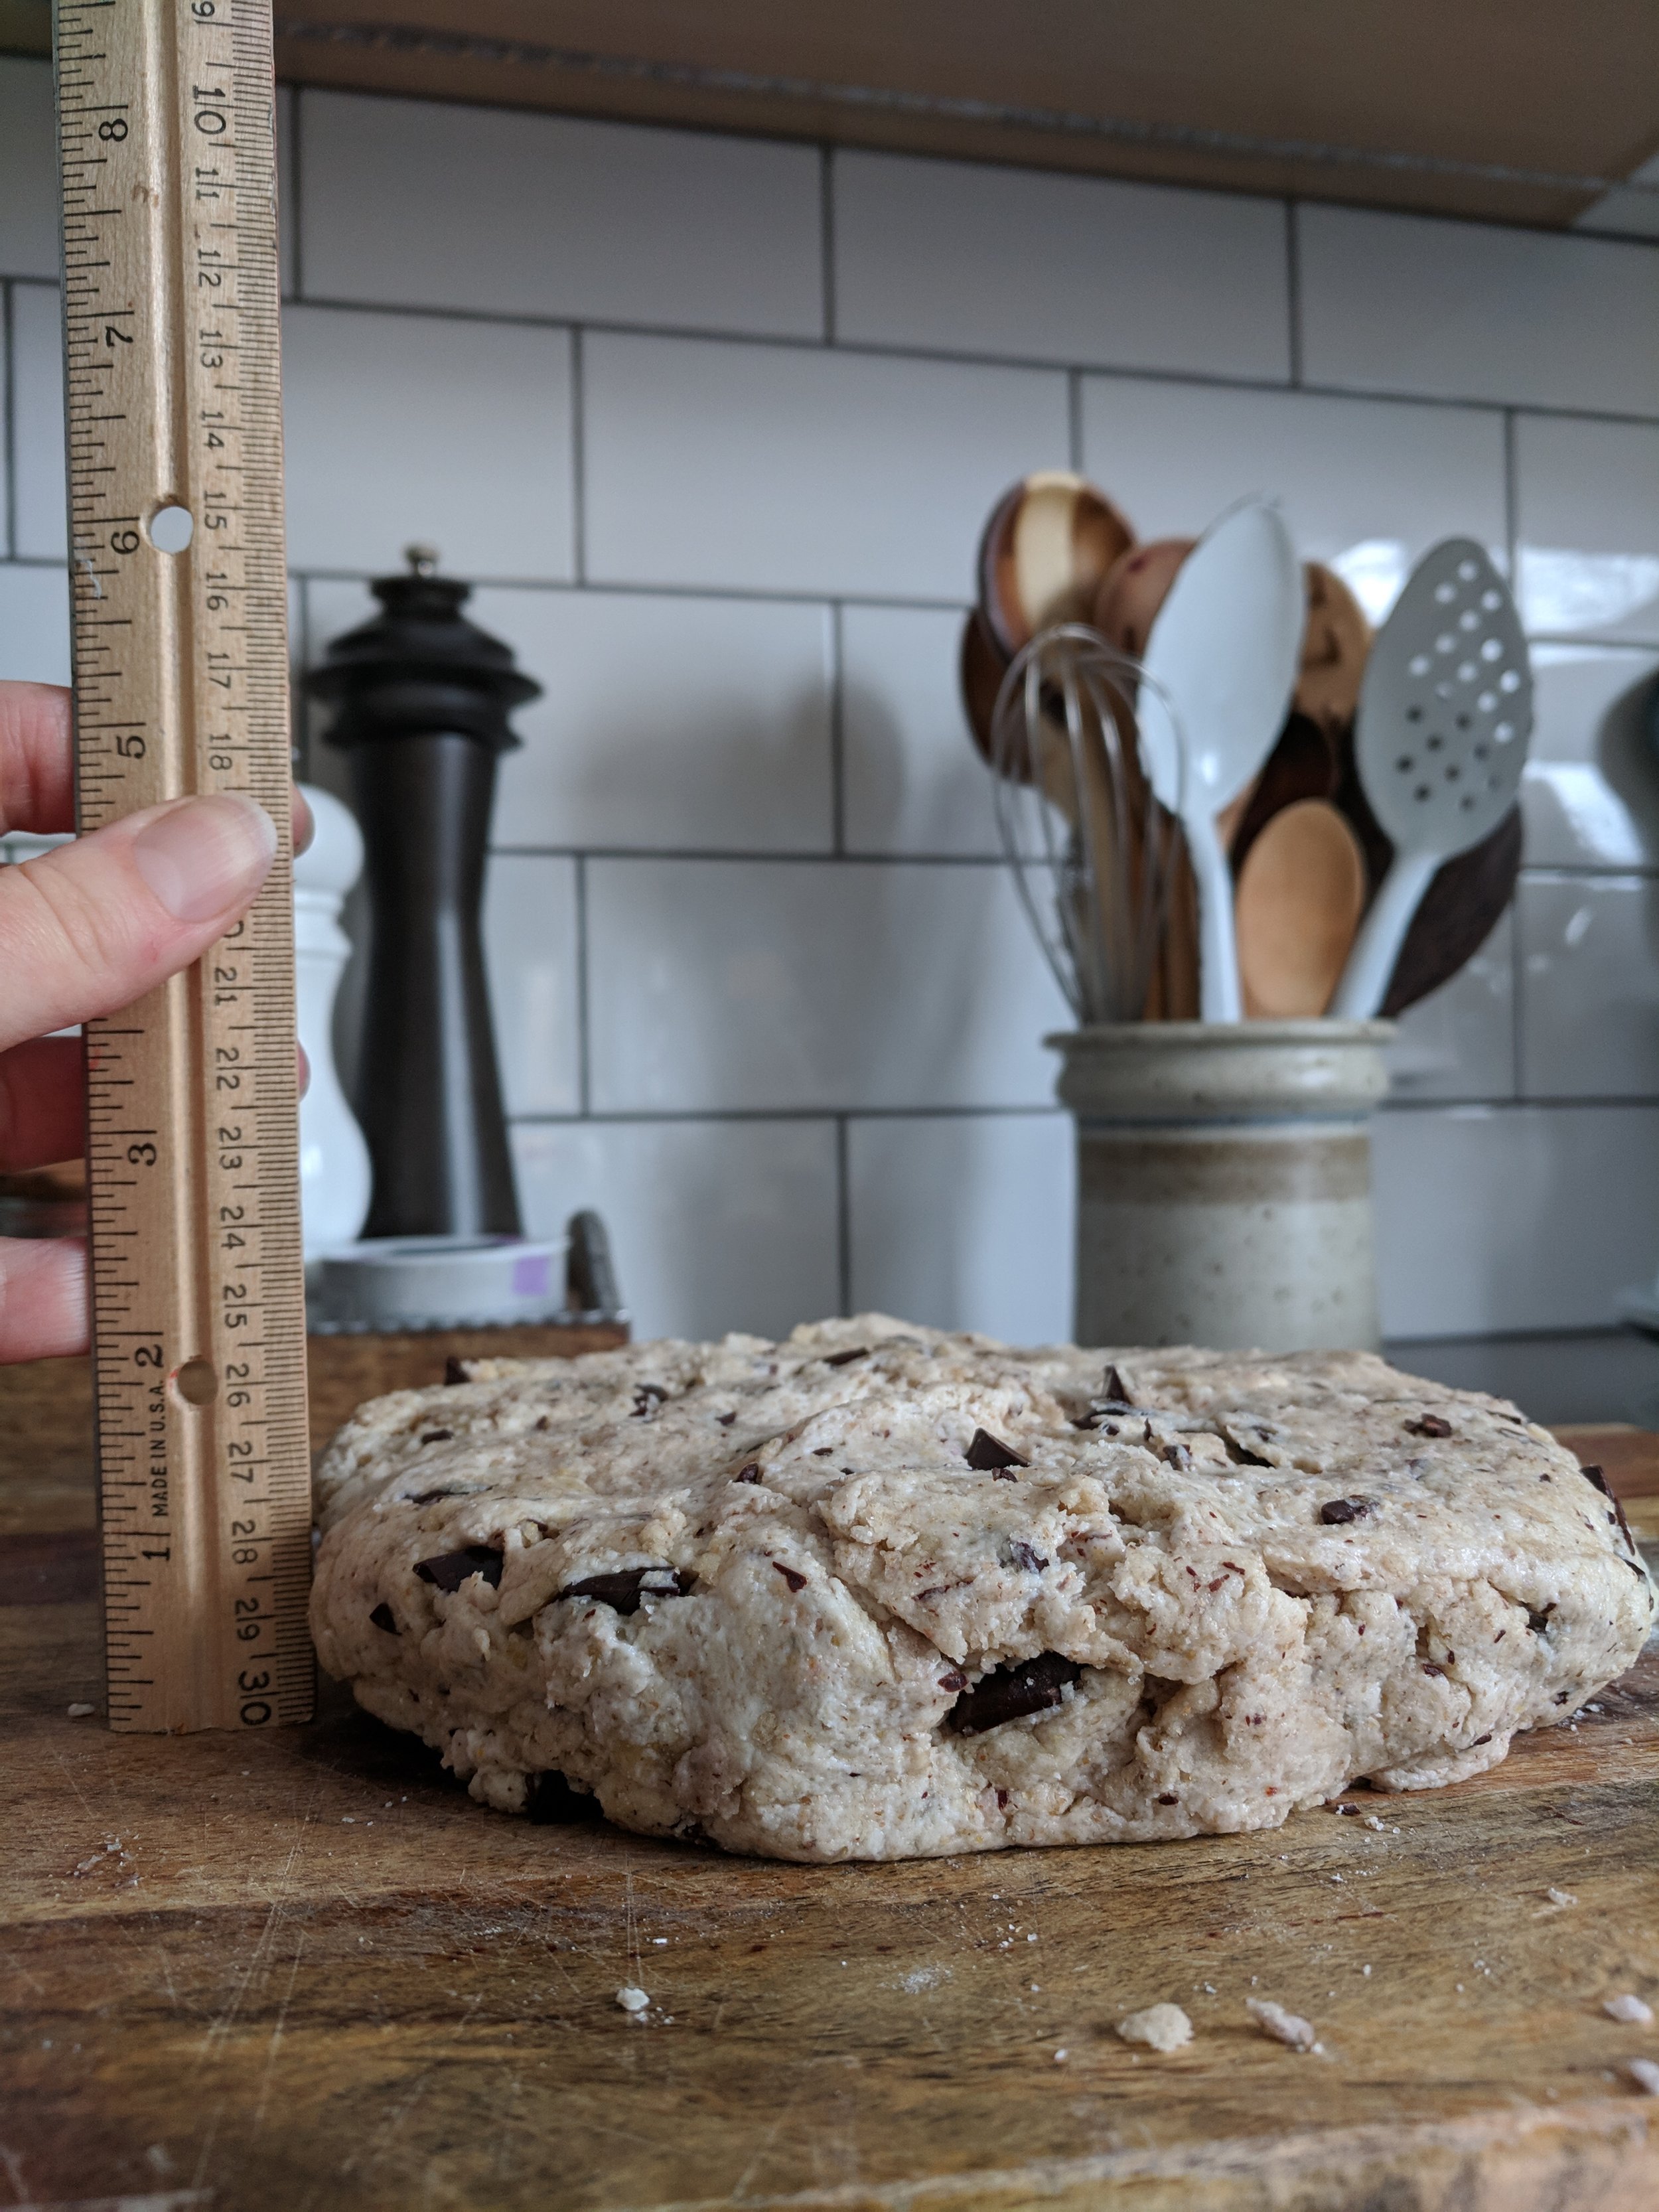
Gently pat the dough into a disk that is roughly 1 1/2 inches high. Slice the disk into 8 wedges.
Arrange the wedges on your lined baking sheet, being sure to leave plenty of room between them. Brush the tops with a splash of milk and sprinkle with a bit of sugar for crunch and shine.
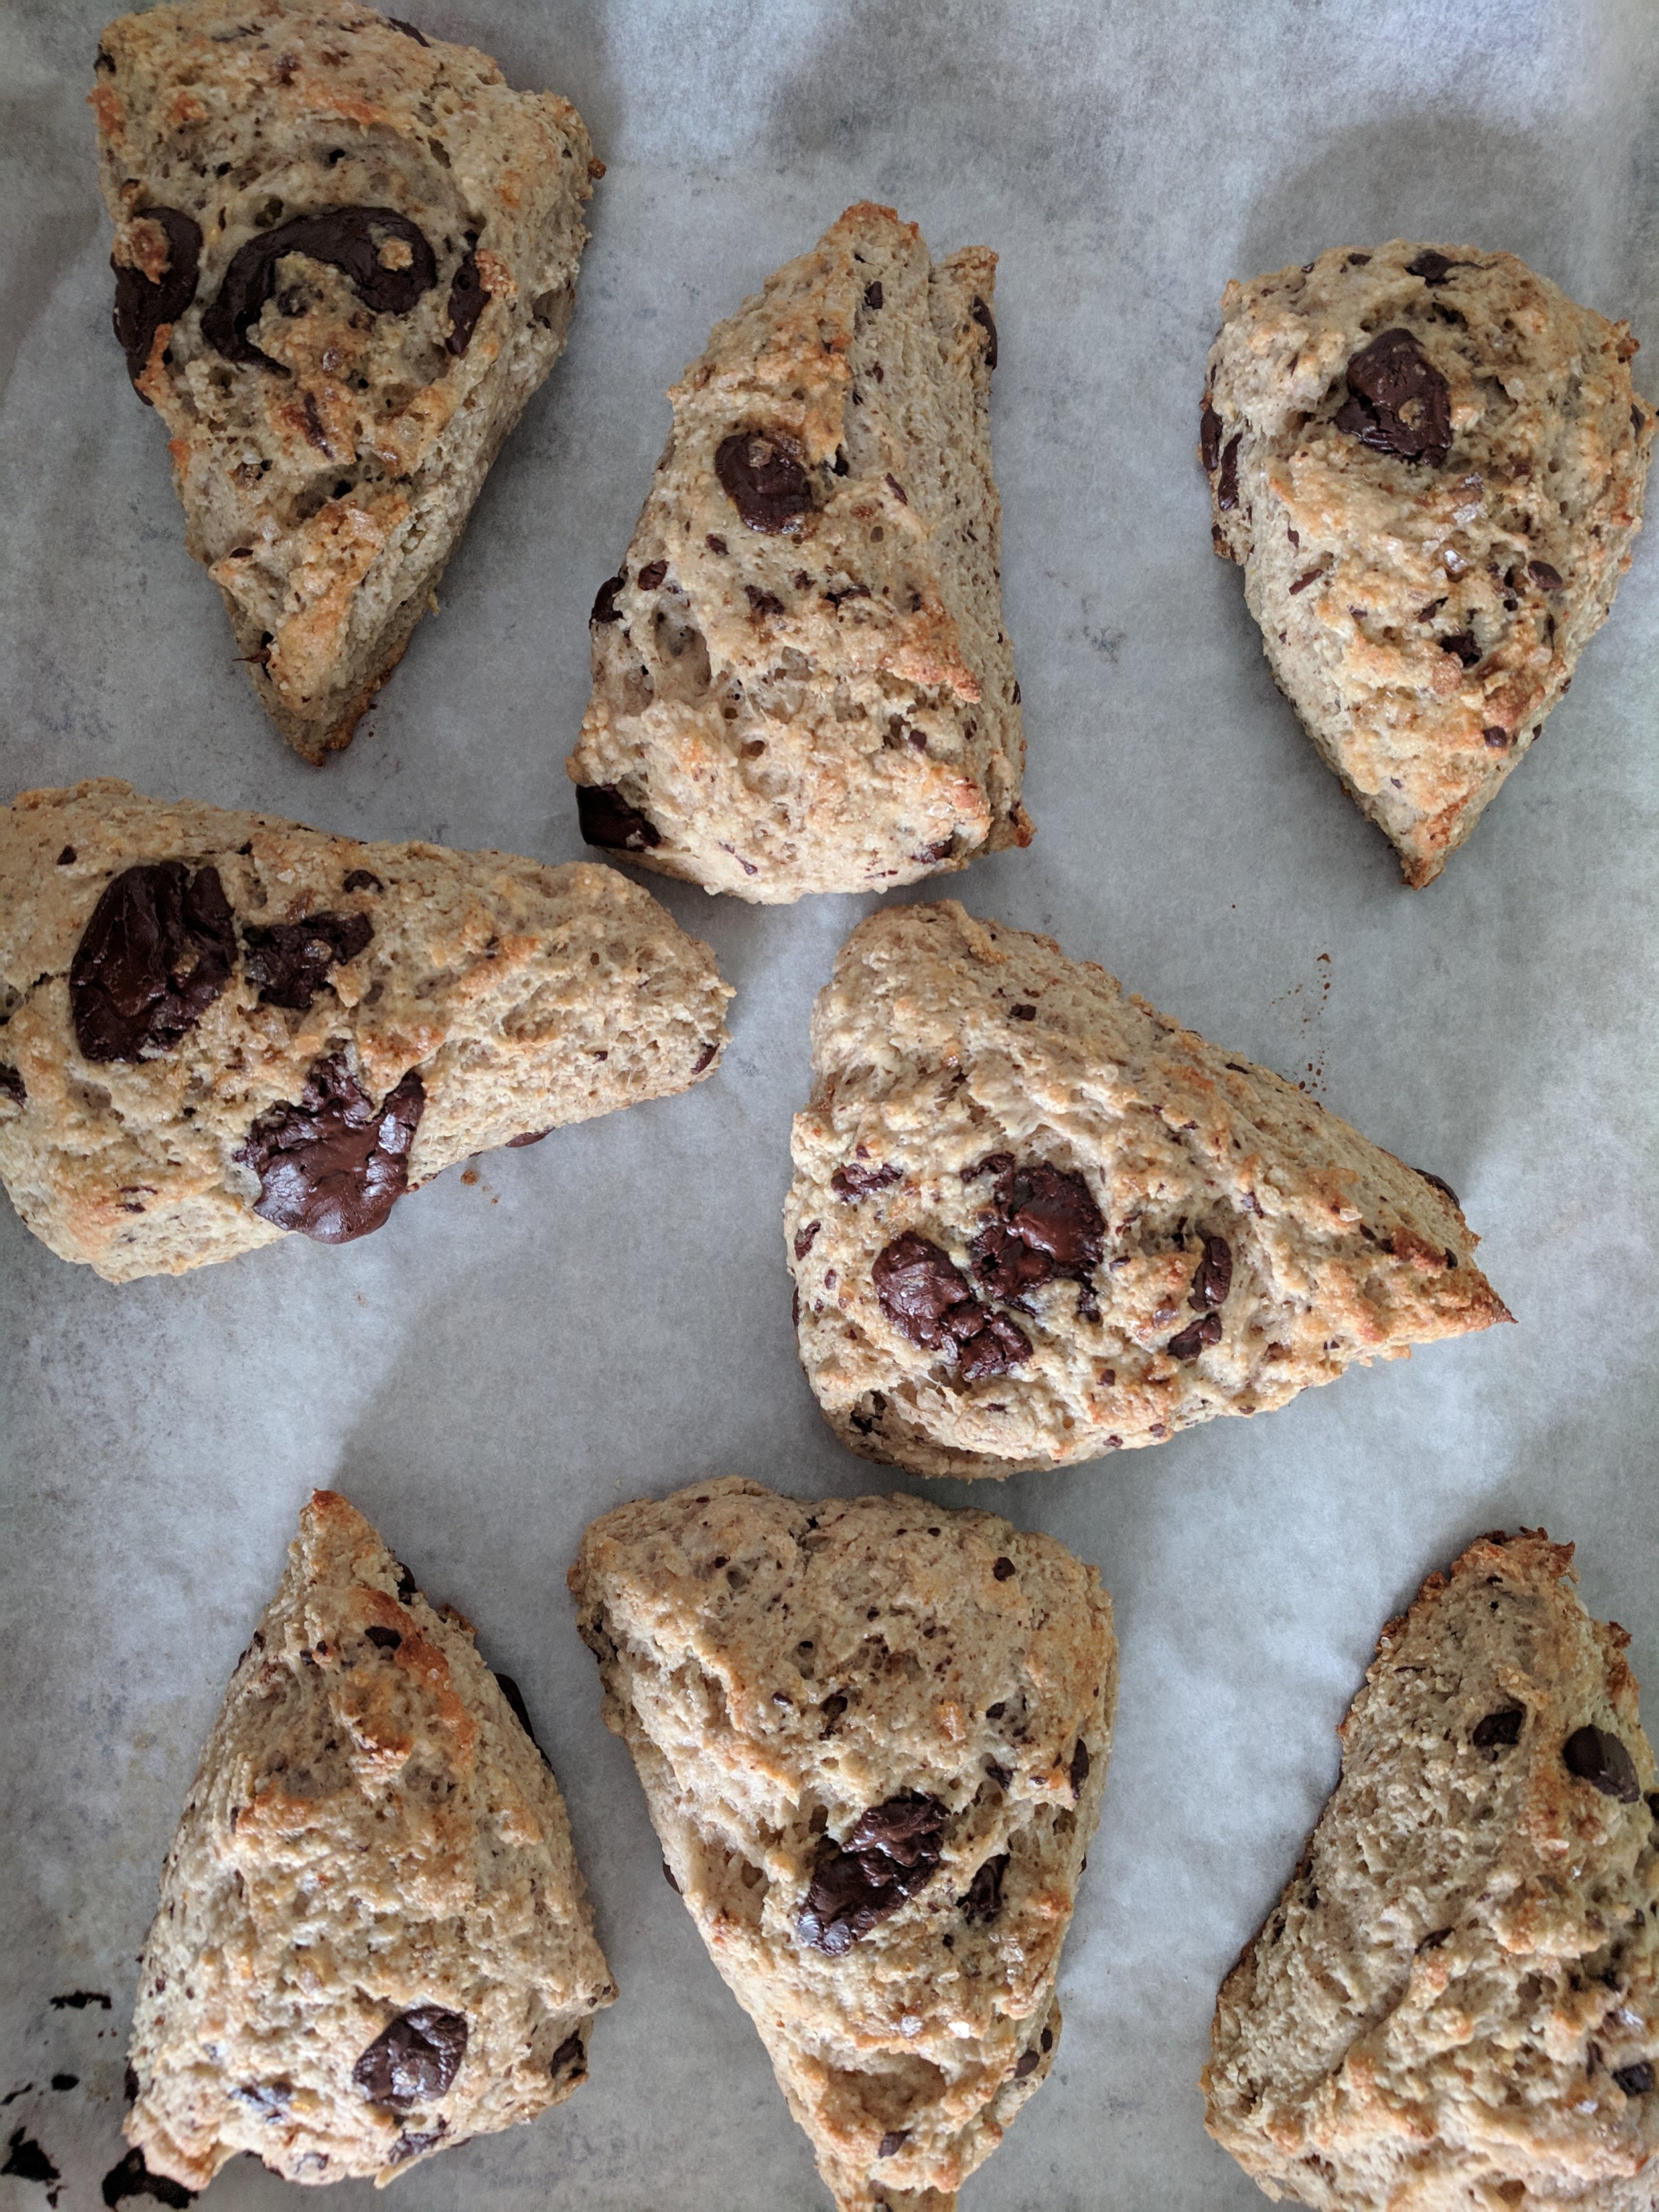
Bake for 14-20 minutes, or the bottoms are deeply browned but not burned, the tops are golden, and they sides feel firm and dry. You don’t want to burn them them, but you really don’t want them to be gummy.
Cool them on a rack to prevent the bottoms from becoming soggy. Serve ASAP with butter. Store any left overs in an airtight container.
Magic Scone Variation #3879:
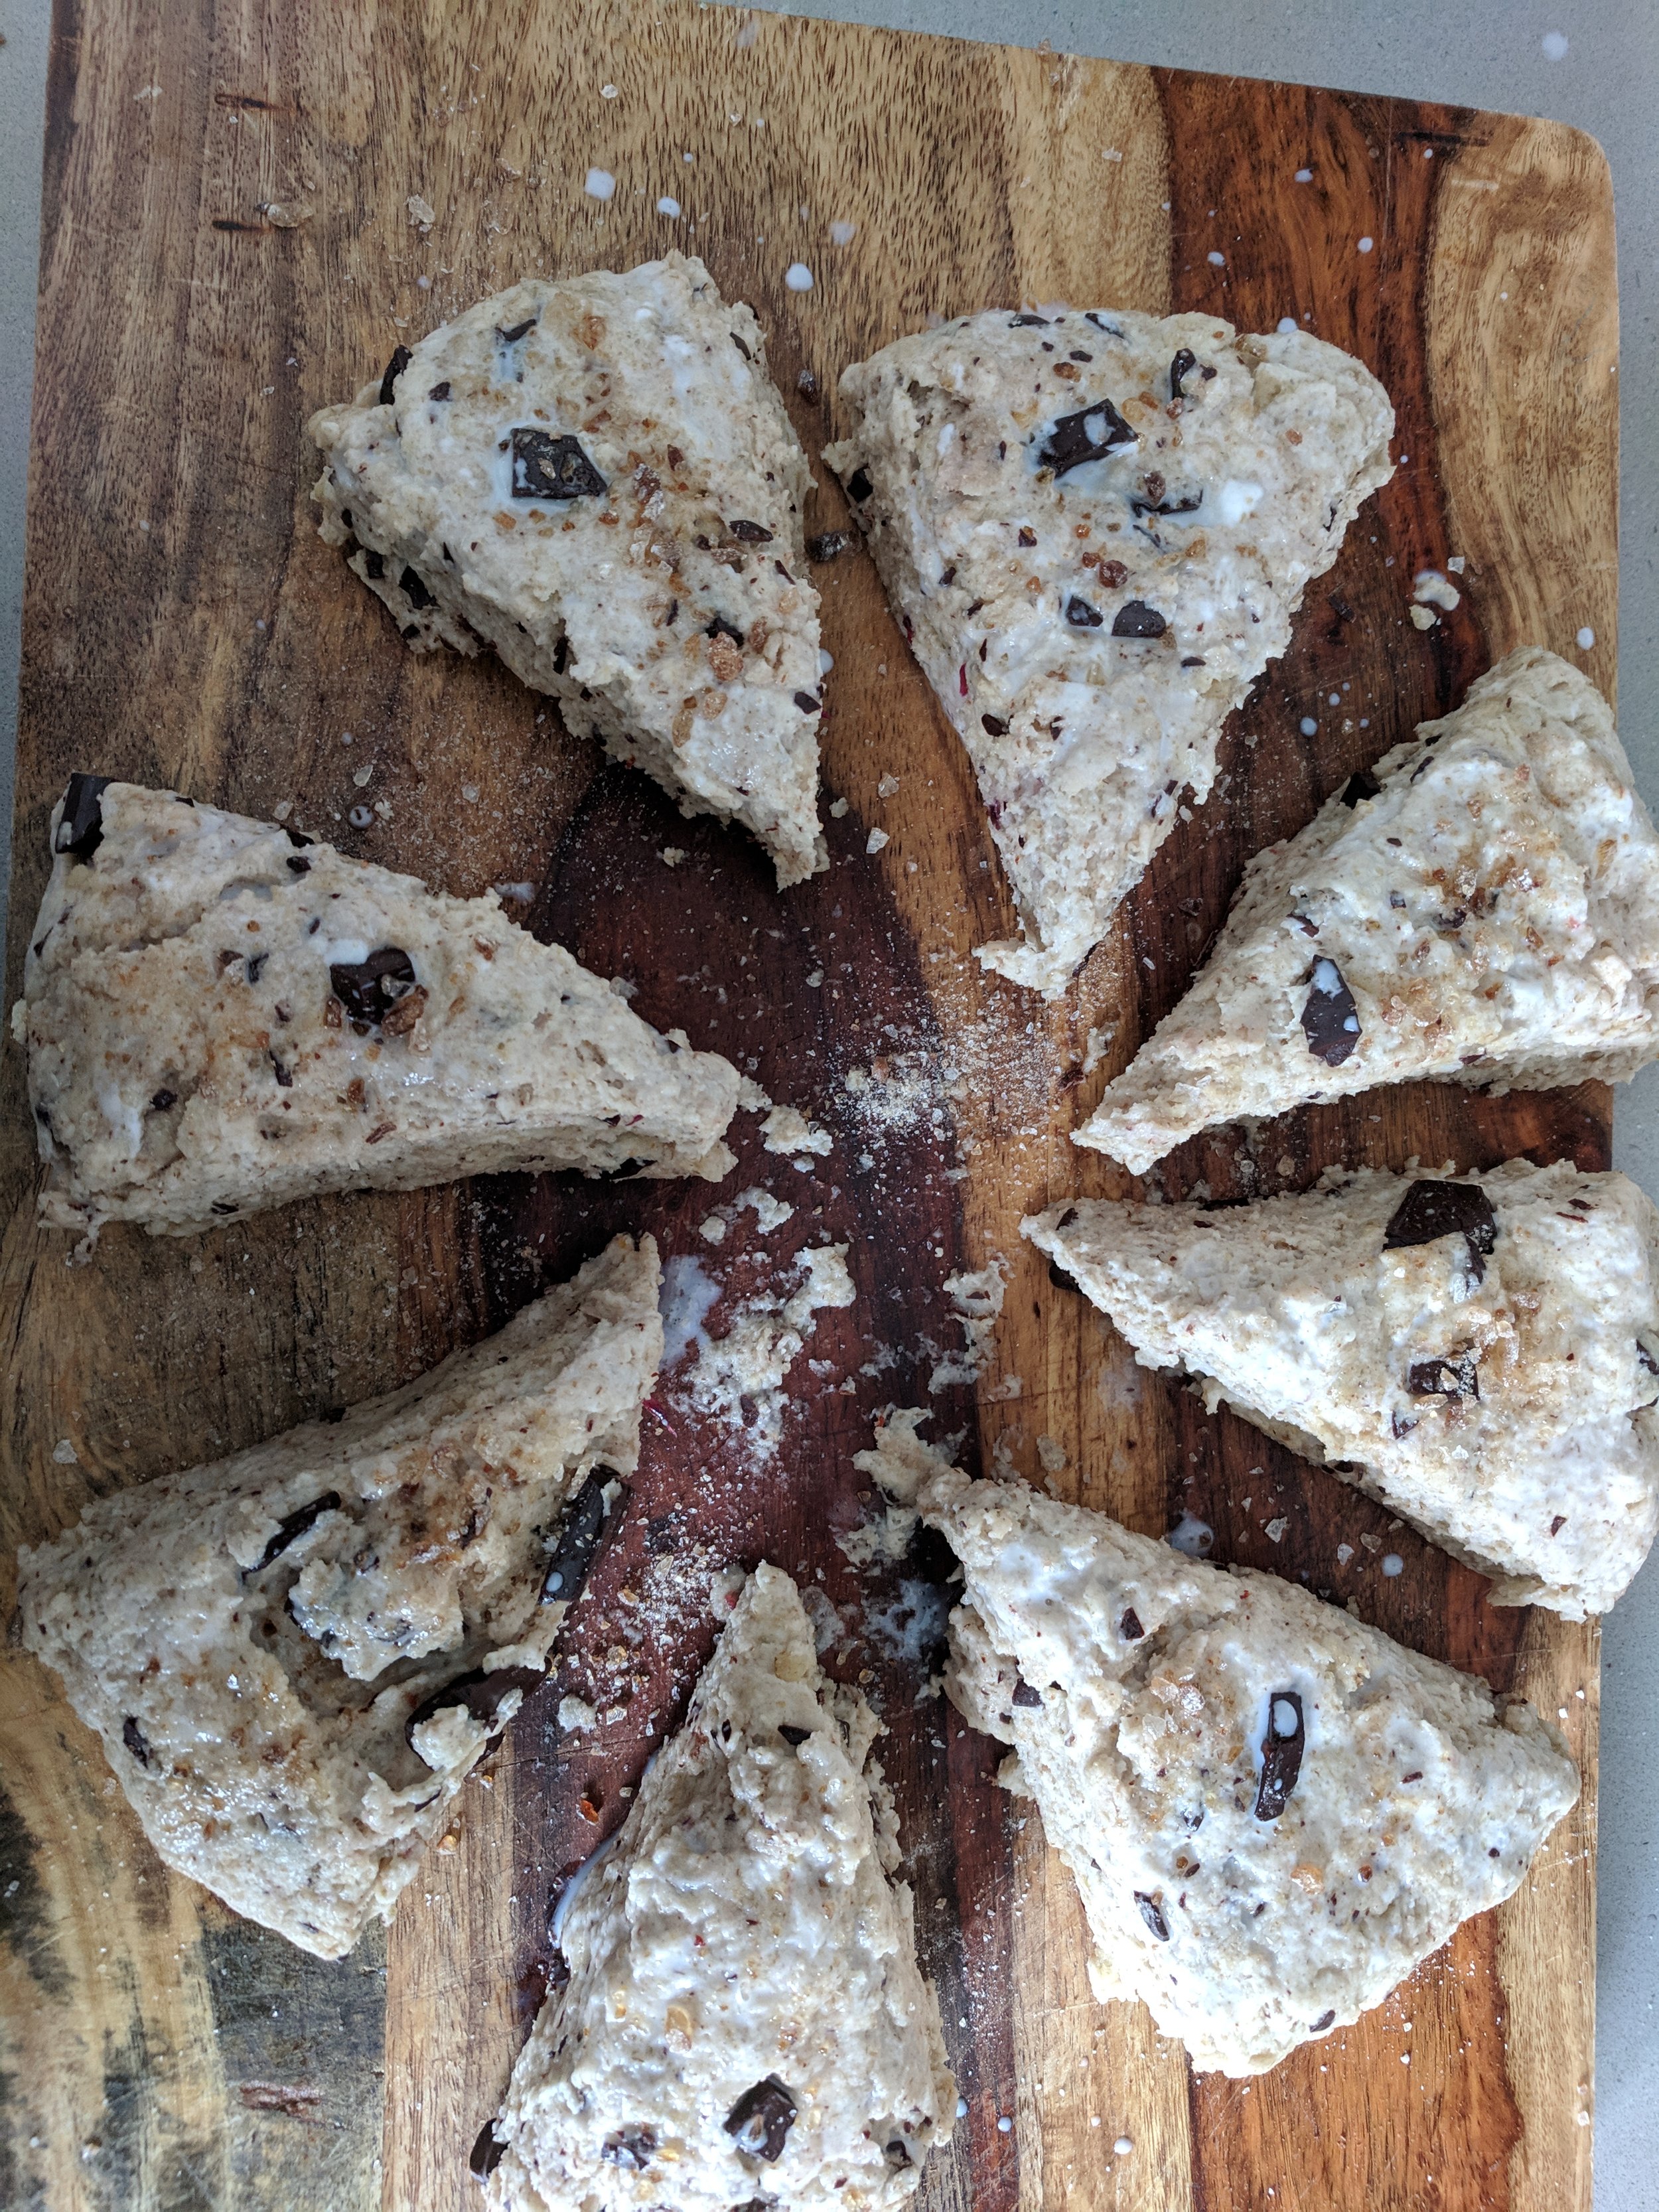
Blood Orange and Rye with Dark Chocolate Puddles


On this particular Saturday morning, Zoe had woken me up early to watch YouTube videos from the Bon Appetit Test Kitchen. We came across an episode in which the wonderful Carla Lalli Music (isn’t that that just the best name you ever did hear?) makes chocolate pecan scones with Ina Garten. We were both delighted by Ina’s use of the phrase “chocolate puddles” to describe the effect she was going for. We immediately decided that we needed chocolate puddles in our lives, and I am confident that that you do, too.

Ingredients:
Dry Ingredients:
1 c. all purpose flour
1 c. rye flour*
1 tbs baking powder
1/2 tsp kosher salt
1/3 c. granulated sugar
Wet Ingredients:
5.3 vanilla yogurt
1/3 c. extra virgin olive oil
1/3 c. milk
zest and juice of one small blood orange**
Mix-in:
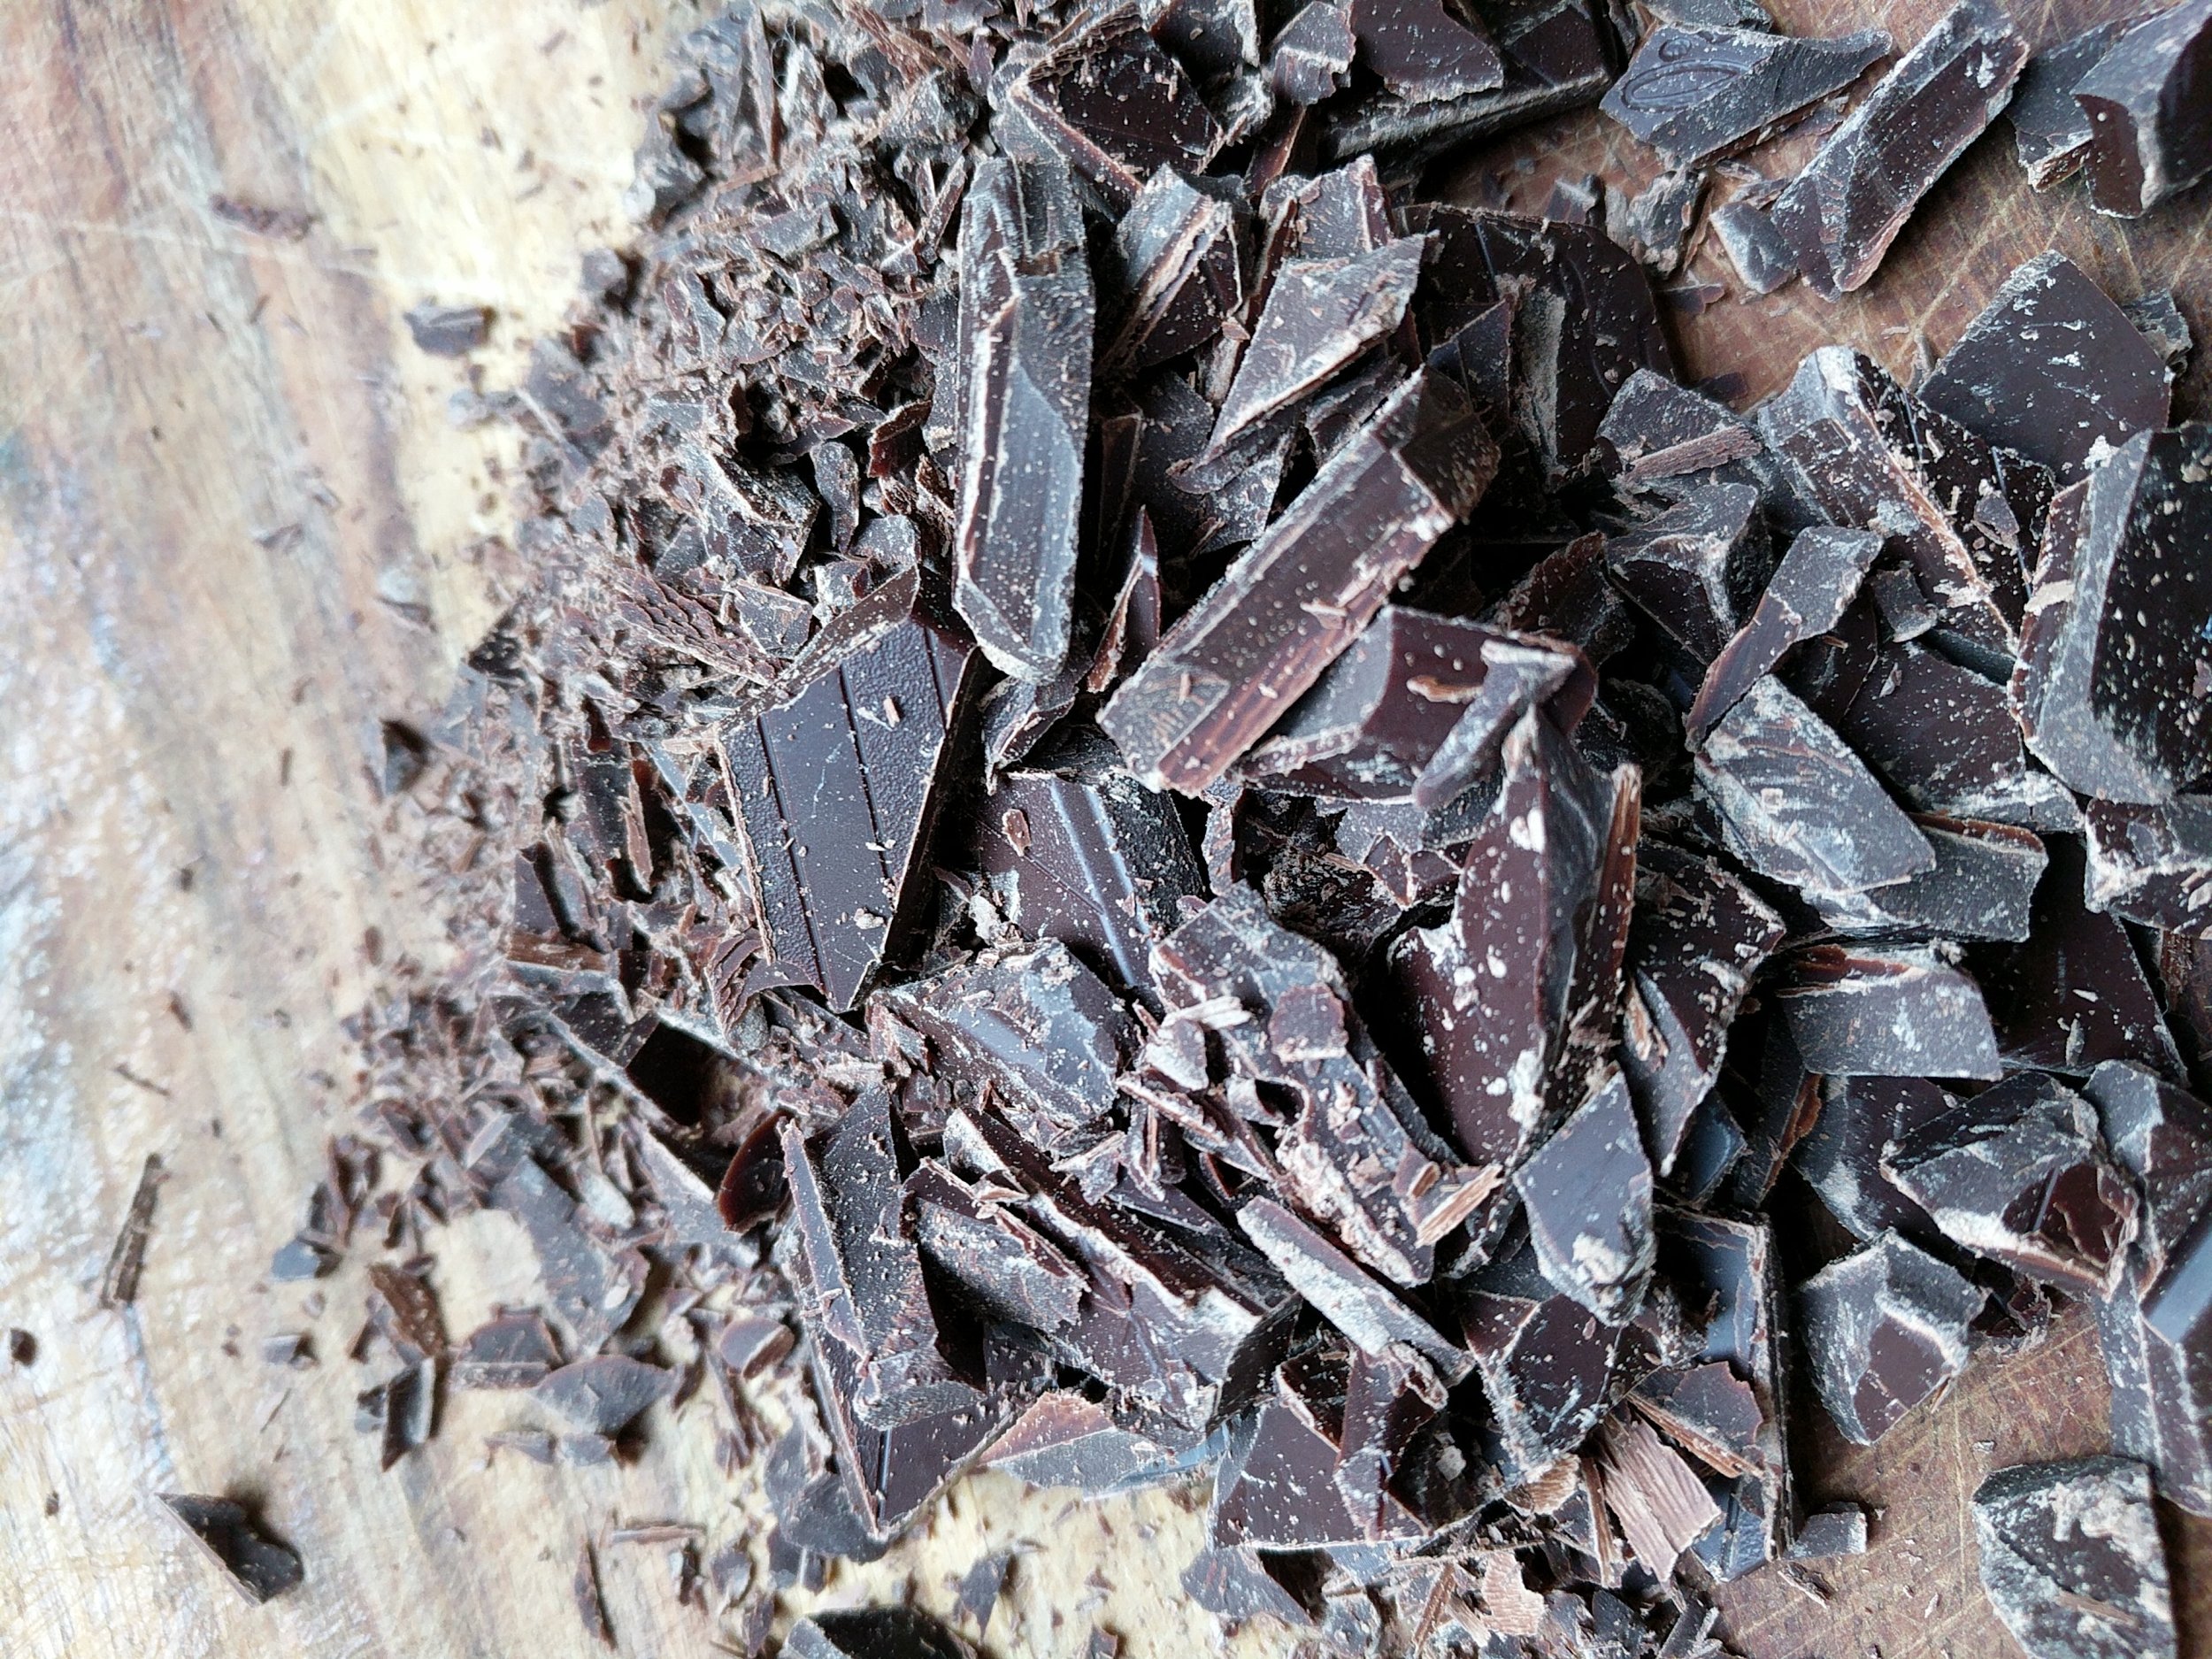
65 grams of dark chocolate, roughly chopped. ***
Topping:
splash of milk
sprinkle of sugar
*No rye flour? No problem! These will still be amazing with just all purpose.
**Obviously any orange will do if you don’t happen to have a blood orange. If your orange is large, just use half.
***I used a 6 of the 10 squares of a Lindt 70% chocolate bar. Use whatever you like, just make sure that some of the pieces stay quite large to encourage puddling :)
Method:
Preheat oven to 400 degrees F. Centre a rack in the middle of your oven.
Line a sheet pan with parchment paper and set aside.
Measure dry ingredients into a large bowl and whisk to combine.
Add wet ingredients to a medium bowl or glass measuring cup and whisk well.
Dump the wet ingredients into the dry and gently stir until just a few dry streaks remain. Add the chocolate and gently fold in. Do not over mix!
Turn out dough onto your counter or cutting board. Gently kneed it by folding it over on itself a couple of times. This make sure that the flour is all incorporated, and help to promote the formation of flaky layers, but don’t get carried away! If you over kneed, they scones will be hockey puck-like.
Gently pat the dough into a disk that is roughly 1 1/2 inches high. Slice the disk into 8 wedges.
Arrange the wedges on your lined baking sheet, being sure to leave plenty of room between them. Brush the tops with a splash of milk and sprinkle with a bit of sugar for crunch and shine.
Bake for 14-20 minutes, or the bottoms are deeply browned but not burned, the tops are golden, and they sides feel firm and dry. You don’t want to over-bake them, but you really don’t want them to be gummy.
Cool them on a rack. Serve ASAP with butter. Store any left overs in an airtight container.

Note: In addition to coffee, scones, and YouTube, there is one additional treatment for The Late Winter Blues. It is a preschooler sitting in a shopping cart wearing sunshine yellow for days and floral boots. You’re welcome.


